My baby transitioned to toddlerhood in what seems like a blink of an eye.
Although my son still co-sleeps with us, I have recently got rid of the crib he never used and bought him a big boy loft bed in hopes of eventually working our way towards getting him in his own bed. But this isn’t an article about how to transition from co-sleeping…. it’s about Mod Podging cute, no-nail, alphabet wall letters.
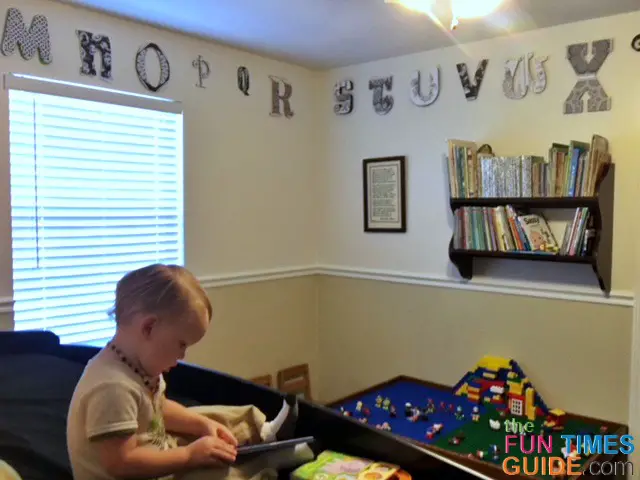
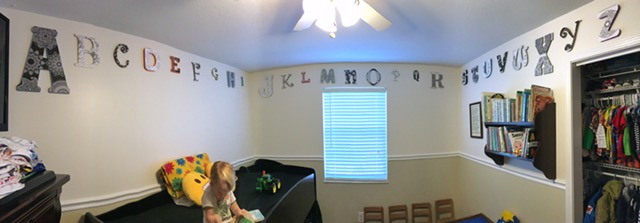
Since we were changing things up in his room, I wanted to add something fun to the walls in my toddler’s bedroom.
I found some cardboard and wooden alphabet letters which were already painted a variety of colors for $20 on Facebook Marketplace. It was almost the entire alphabet, but missing a couple letters — which I knew could be found at any craft store.
These days, with a toddler by my side, my craft projects need to be relatively fast and easy to do — or they simply will not get done. The letters did end up sitting on a shelf for a bit until I came across an adult coloring book I had received during a 3-week hospital stay after breaking my back.
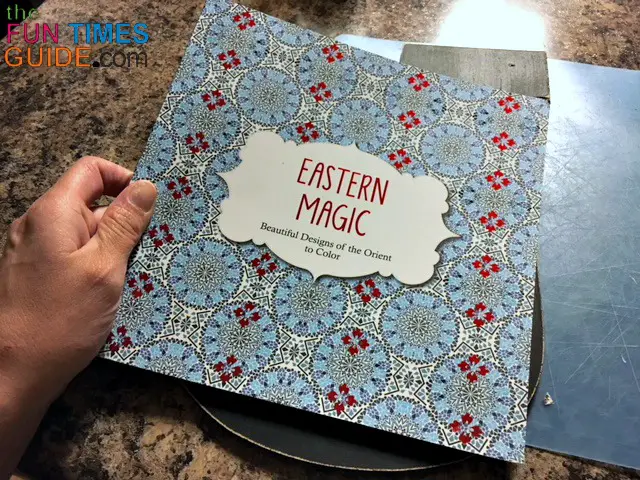
My gifter friend thought it would be a good way to pass the time. Titled Eastern Magic, it was full of ornate designs. Sadly, I only colored one page and it has sat on my bookshelf for the last couple of years.
So, when I came across the book again, I was inspired to give the designs within the pages life by bringing them out of their bound covered darkness and onto these alphabet letters!
Mod Podge would be the answer to having the designs sealed and finally revealed in their original black and white glory.
What You’ll Need…
Here’s a list of the supplies I used to mod podge paper to wood and cardboard letters:
- Acrylic paint
- Small paint brush
- Cutter Bee retractable knife blade
- Flexible plastic cutting board/mat
- Mod Podge glue (in gloss finish)
- Foam brushes
- Eastern Magic adult coloring book
- Command Strips
- Mod Podge roller/brayer
- Wooden alphabet letters and/or cardboard alphabet letters in various fonts and sizes (I used both types)
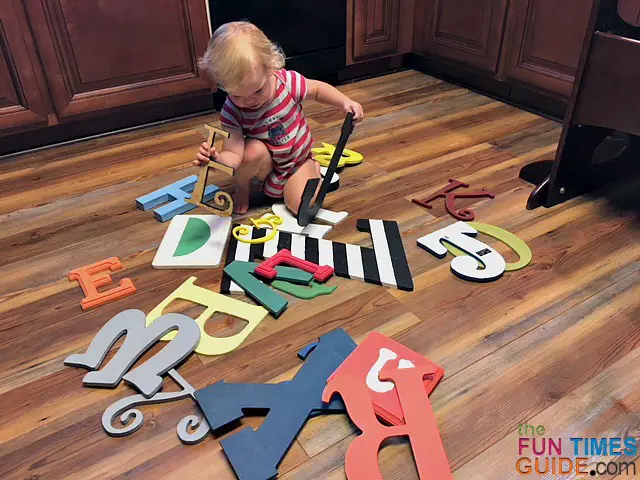
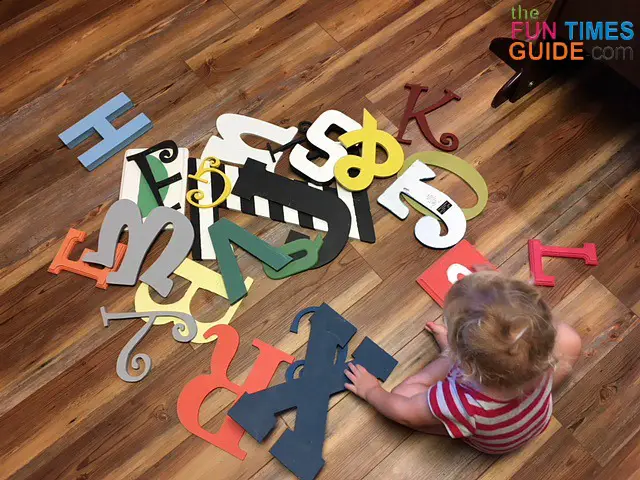
The letters I acquired were previously painted a variety of colors. This saved me a lot of time — because I didn’t mind the variety of colors which would be exposed only on the sides of each letter after I added the Mod Podge glue to my own designs on top of each letter.
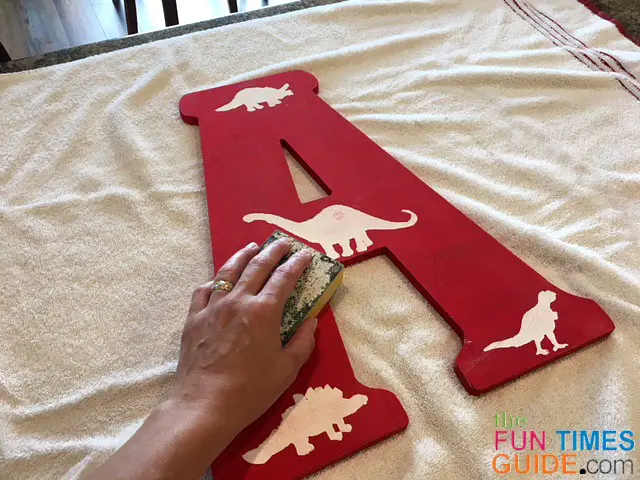
I did have to paint a couple of the new replacement letters — since the alphabet set I bought was incomplete.
I found that acrylic paint works well. (I had some leftover paint on hand from my DIY diaper wreath project.)
I also used a sanding block to sand the edges and surfaces — because the previous paint job was a bit rough around the edges.
How To Mod Podge Paper To Wood And Cardboard Letters
NOTE: I had a variety of cardboard and wooden alphabet letters — it worked the same on both. I worked on one letter at a time.
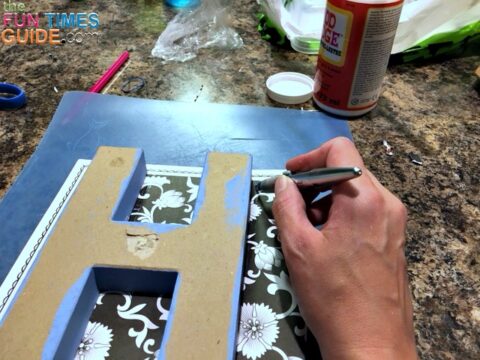
This is how I used Mod Podge glue to adhere adult coloring book pages to alphabet letters:
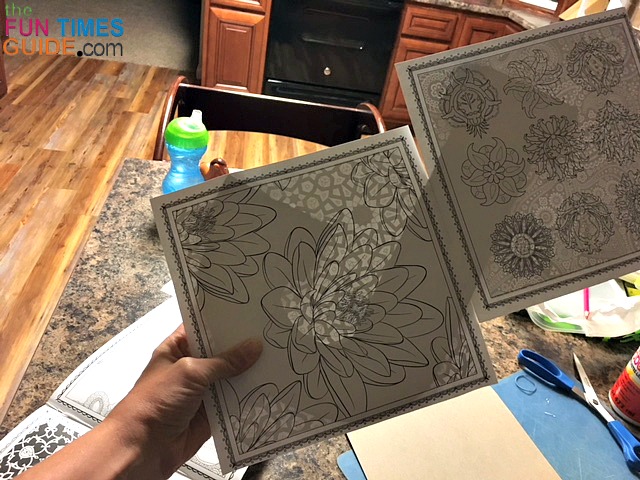
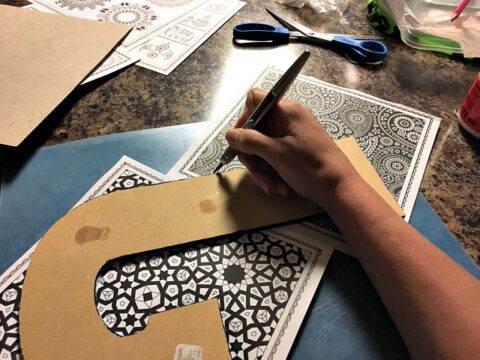
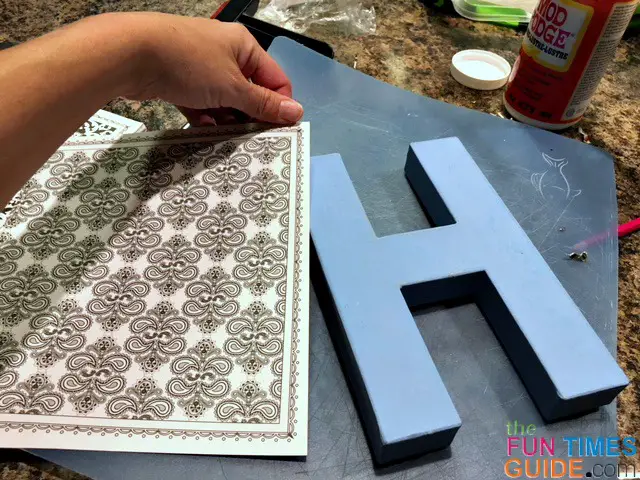
- First, I chose a coloring book page. Some letters were bigger than others and required 2 to 3 coloring pages. Because the designs were all different, it would be impossible to match, so I made the seams where it was all black or all white — and then it transitioned to a new design almost seamlessly.

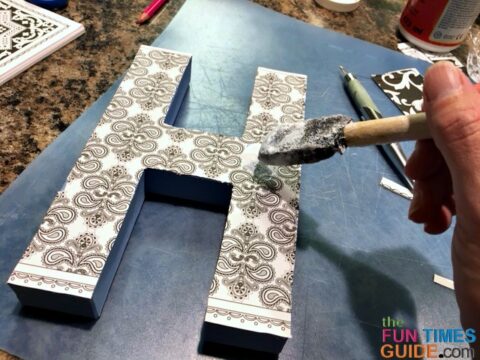
- Next, I applied a layer of Mod Podge glue to the entire front of the alphabet letter. Then, I placed the entire page face up on the letter — positioning the page where the design would cover the most surface. (I used the roller to get any bubbles out.)
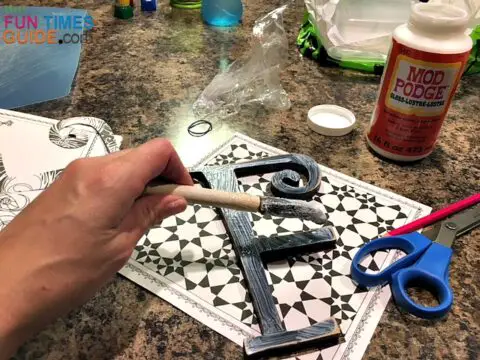

- After flipping the letter with the coloring page already adhered upside down on a clean, dry plastic cutting sheet (I wiped it down each time to keep it free from glue), I used a retractable blade to trace the letter and ultimately cut away the excess from the outline.
TIPS: I’ve found that it’s best to place pressure on the letter near the area in which you are cutting. I cut the excess paper while the glue was still wet and it worked great as long as I kept the blade moving with steady and consistent pressure. It helped to rotate the entire cutting sheet as I worked my way around each letter. - I peeled away the excess paper from the alphabet letter.
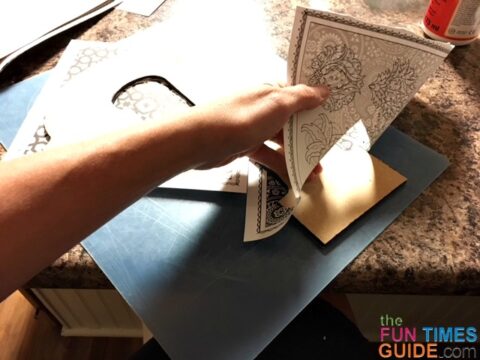
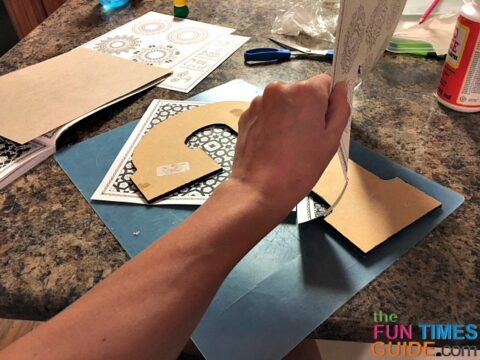
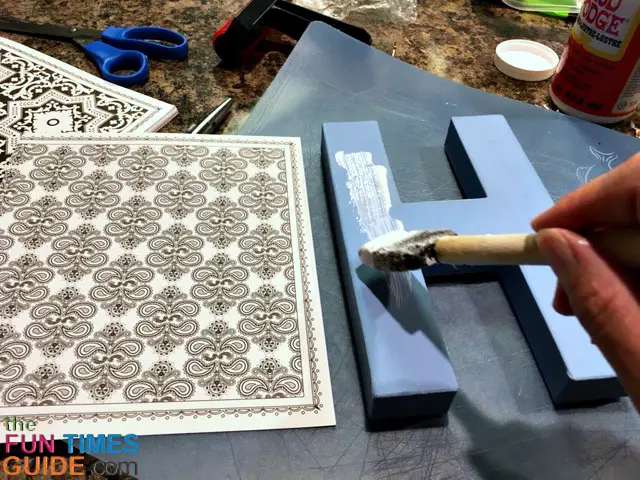
- I carefully smoothed out or cut away any rough edges using the roller.
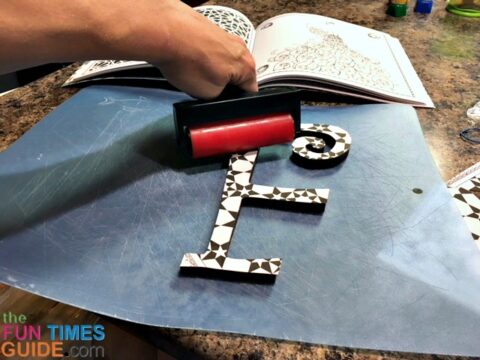
- I flipped the letter over and applied a layer of Mod Podge on the new surface of the letter — to make it look slightly glossy. Then, let the letter dry for at least 15 minutes.
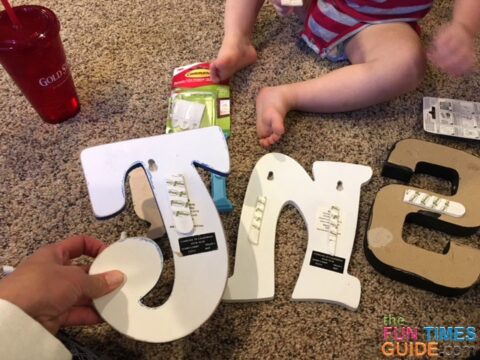
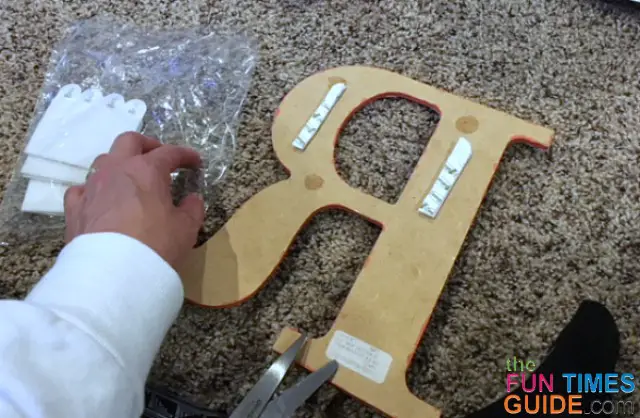
- I applied Command Strips to the back of the letter. The alphabet letters varied in size — so sometimes I cut the strip in half to even out the support; the big ones got 2 strips.

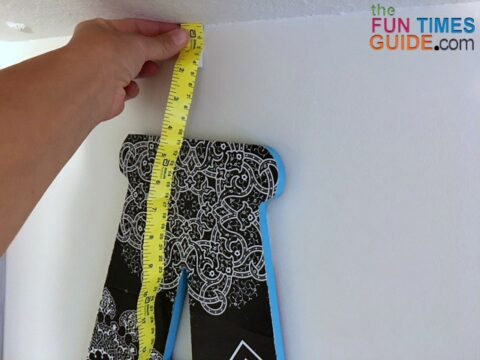
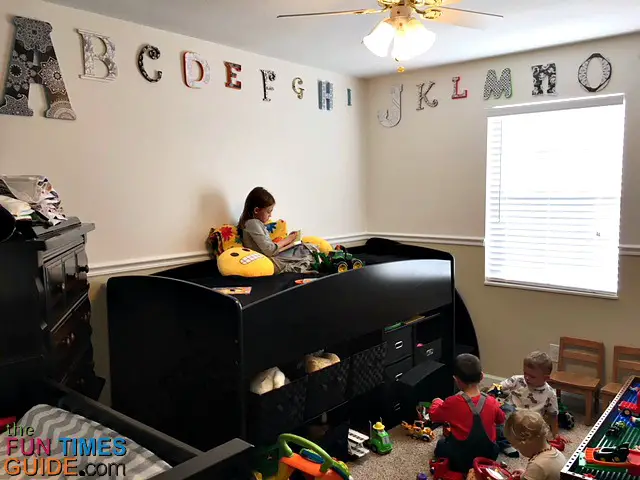
- I measured the walls where I wanted to place the letters, added up all the measurements, and divided the number by 26. It worked that a letter was placed every 12 inches. I marked with a pencil every 12 inches for centering and approximately 4 inches down from the ceiling for the start of each letter.
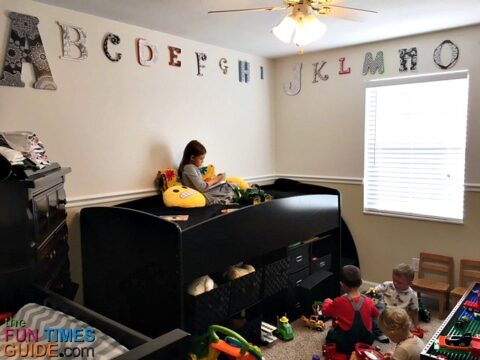
- Once I had the placements marked, then I just had to peel and stick each letter in place.


TIP: The Command Strips documentation recommends pressing and holding for 30 seconds for best results to adhere to a wall. They also indicate that there will be no damage to the wall when it comes time to remove the letters from the wall.
A Fun Way To Use Alphabet Letters In Toddler Games
Having the alphabet letters around my toddler’s bedroom reminds me of a game I like to play with him — especially when I would like something new to say.
The Alphabet Adjective Game is a good exercise for both of us — because he gets to hear me say all these words and I get to recall new words since the last time we played.
Here’s how we play the game:
- I describe to my son what I think of him using an adjective from every letter of the alphabet.
- I try to think of new words each and every time — like these positive adjectives to describe people.
Obviously, some letters are a lot harder than others — but it sounds something like this:
“You are… amazing, brilliant, charming, dashing, exquisite, feisty, genuine, handsome, kind, intelligent, joyful, loving, magnificent, neighborly, original, precocious, quintessential, radiant, stupendous, thoughtful, understanding, vivacious, wise, xenodochial, YOU, zestful!”
I do sing the Alphabet Song to my son all the time. And, sometimes, I’ll even play it on the keyboard for him.
I don’t know if it will help him to have more exposure to the letters on the wall in his room or not. But, at the very least, I think these alphabet letters turned out rather cute — and gender neutral — for DIY wall decor in a toddler’s room.

Here are some fun facts about each letter of the alphabet.
Happy Alphabeting with your toddler!